Guía de estudio · Edición 2026
CCMA Study Guide — 2026 Edition
Written to NHA's current CCMA test plan — 180 questions (150 scored + 30 pretest) in 3 hours.
Edición: New for 2026: written to NHA's current CCMA test plan (exam since Jan 10, 2024): 180 Q, 3 hours
- Extensión
- 277 páginas
- Preguntas de práctica en el libro
- 342
- Simulacro en línea de PrepPass
- 150 preguntas · 180 min
- Datos del examen verificados
- septiembre de 2026
- Archivo actualizado
- octubre de 2026
- Entrega
- PDF + EPUB · en inglés · descarga inmediata
Sobre este libro
Written to NHA's current CCMA test plan — 180 questions (150 scored + 30 pretest) in 3 hours: 14 chapters on NHA's 7 domains, 342 original questions and a full 180-question practice exam.
Solicitud de examen: $169 por intento, que se paga a National Healthcareer Association. Repetir el examen vuelve a costarlo. Esta guía: $19.99, pago único.
Datos del examen, a quién le sirve y qué cambió
Sobre el examen en sí
| Organismo administrador | National Healthcareer Association (NHA) — examen administrado por a PSI testing center, a live remote proctoring provider, or the candidate's own school or employer |
|---|---|
| Preguntas | 180 preguntas (150 calificadas, 30 de prueba sin calificar) Fuente: NHA — Test Plan for the Certified Clinical Medical Assistant (CCMA) Exam (2022 job analysis, PDF) |
| Tiempo límite | 180 minutos Fuente: NHA — Test Plan for the Certified Clinical Medical Assistant (CCMA) Exam (2022 job analysis, PDF) |
| Puntuación para aprobar | Puntuación escalada de 390 en una escala de 200–500 |
| Tarifas |
Fuente: NHA store — Certified Clinical Medical Assistant (CCMA) Exam Application |
| Idiomas disponibles | Inglés |
Mira dentro del libro
Tres páginas reales, renderizadas directamente del PDF que descargas — una página de referencia, una de explicación y una pregunta resuelta, siempre en ese orden. Nada se rediseñó para verse mejor.
- Referencia rápidaChapter 14 — Medical Law and Ethics · Página 184 del PDF
Una página a la que puedes volver: cifras, plazos o términos reunidos en un solo lugar.
- Cómo se enseñaChapter 4 — Patient Intake and Vital Signs · Página 69 del PDF
Una página de explicación: el material enseñado en prosa, en el orden en que lo evalúa el examen.
- Una pregunta resueltaPart 3F — EKG and Cardiovascular Testing (7 questions) · Página 218 del PDF
Una pregunta de práctica con su respuesta y el razonamiento detrás — no solo la clave.
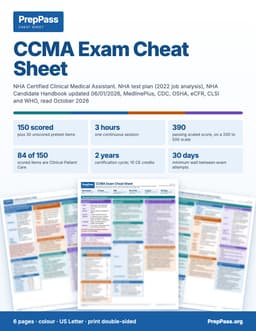
¿Examen en menos de dos semanas?
Esta guía es la enseñanza, para leer durante semanas. Si tu examen es en menos de dos semanas, la hoja de referencia a color imprimible es el otro producto: las cifras clave, por secciones.
6 páginas · US Letter · PDF imprimible · tuyo para siempre
How this book compares
NHA publishes the CCMA test plan for free and sells its own online study guide and practice tests. This book is an independent written review; Mometrix sells a CCMA study guide.
| Resource | Price | What you get | Choose it if |
|---|---|---|---|
| This bookCCMA Study Guide — 2026 EditionPrepPass | $19.99 | Downloadable study guide for the CCMA exam
| Choose this book if you want a short written review of the clinical and administrative topics alongside your training. |
| From the exam bodyCCMA test plan (opens the publisher's page in a new tab)National Healthcareer Association (NHA) | Free (PDF) | The official list of what the exam covers | Read it in any case to check every topic the exam covers. |
| From the exam bodyCCMA Online Study Guide and Practice Tests (opens the publisher's page in a new tab)National Healthcareer Association (NHA) | Price not listed on the page we checked | The exam body's own interactive study materials
| Choose NHA's materials if you want practice tests from the organization that writes the exam. |
| AlternativeCCMA Exam Secrets Study Guide (opens the publisher's page in a new tab)Mometrix Test Preparation | $31.99 ebook; $36.99 printed book | Study guide with practice questions
| Choose Mometrix if you want a printed copy. |
This book
CCMA Study Guide — 2026 Edition
PrepPass
- Price
- $19.99
- What you get
Downloadable study guide for the CCMA exam
- 342 practice questions with explanations
- 277 pages, PDF + EPUB
- Choose it if
- Choose this book if you want a short written review of the clinical and administrative topics alongside your training.
From the exam body
CCMA test plan (opens the publisher's page in a new tab)
National Healthcareer Association (NHA)
- Price
- Free (PDF)
- What you get
The official list of what the exam covers
- Choose it if
- Read it in any case to check every topic the exam covers.
From the exam body
CCMA Online Study Guide and Practice Tests (opens the publisher's page in a new tab)
National Healthcareer Association (NHA)
- Price
- Price not listed on the page we checked
- What you get
The exam body's own interactive study materials
- An online study guide with quizzes and flashcards, and a set of three online practice tests with up to two attempts each
- Choose it if
- Choose NHA's materials if you want practice tests from the organization that writes the exam.
Alternative
CCMA Exam Secrets Study Guide (opens the publisher's page in a new tab)
Mometrix Test Preparation
- Price
- $31.99 ebook; $36.99 printed book
- What you get
Study guide with practice questions
- Practice test questions with detailed answer explanations
- Choose it if
- Choose Mometrix if you want a printed copy.
Other resources' prices and contents are as listed on each publisher's or seller's own page, checked September 24, 2026. Prices change; confirm on the linked page before you buy. This book's price and contents come from our own catalog.
Sources (2)
- https://www.nhanow.com/certification/nha-certifications/certified-clinical-medical-assistant-(ccma) — read September 24, 2026
- https://www.mometrix.com/studyguides/ccma/ — read September 24, 2026
Qué incluye — y qué no
Incluido
- 14 chapters mapped to NHA's 7 CCMA domains, with a test plan crosswalk
- A full 180-question practice exam, the real exam's length, split by NHA's domain counts
No incluido
- No se envía copia impresa — es un archivo que descargas y puedes imprimir tú
- El libro no incluye curso en vídeo, instructor ni tutorías — los vídeos gratis del sitio van aparte
Todo lo incluido y todo lo que no
Incluido
- 342 original questions, each with a worked explanation citing its source
- Clinical Patient Care in depth: vitals, injections, infection control, point-of-care tests, phlebotomy and EKG
- A "What's new" section and a quick-reference numbers card for the last week
- PDF + EPUB you keep
No incluido
- No incluye tu inscripción al examen ni la tasa del centro, que sigues pagando al organismo oficial
Contenido
Ver 29 secciones y la página en la que empieza cada una
- Chapter 1 — Foundational Knowledge: Health Care Systems, Medical Terminology, Nutrition and Psychologyp. 11
- Chapter 2 — Foundational Knowledge: Basic Pharmacologyp. 29
- Chapter 3 — Anatomy and Physiologyp. 44
- Chapter 4 — Patient Intake and Vital Signsp. 55
- Chapter 5 — General Patient Care I: The Exam Room, Sterile Field, Positioning and Medication Administrationp. 71
- Chapter 6 — General Patient Care II: Procedures, First Aid, Emergencies, Prescriptions and the EHRp. 85
- Chapter 7 — Infection Control and Safetyp. 100
- Chapter 8 — Point-of-Care Testing and Laboratory Proceduresp. 113
- Chapter 9 — Phlebotomyp. 124
- Chapter 10 — EKG and Cardiovascular Testingp. 136
- Chapter 11 — Patient Care Coordination and Educationp. 145
- Chapter 12 — Administrative Assistingp. 155
- Chapter 13 — Communication and Customer Servicep. 168
- Chapter 14 — Medical Law and Ethicsp. 179
- Part 1 — Foundational Knowledge and Basic Science (18 questions)p. 192
- Part 2 — Anatomy and Physiology (10 questions)p. 195
- Part 3A — Patient Intake and Vitals (17 questions)p. 197
- Part 3B — General Patient Care (34 questions)p. 201
- Part 3C — Infection Control and Safety (18 questions)p. 208
- Part 3D — Point of Care Testing and Laboratory Procedures (11 questions)p. 212
- Part 3E — Phlebotomy (14 questions)p. 214
- Part 3F — EKG and Cardiovascular Testing (7 questions)p. 217
- Part 4 — Patient Care Coordination and Education (14 questions)p. 219
- Part 5 — Administrative Assisting (14 questions)p. 222
- Part 6 — Communication and Customer Service (15 questions)p. 225
- Part 7 — Medical Law and Ethics (8 questions)p. 228
- Practice Exam Answer Key and Explanationsp. 230
- Appendix A — Test plan crosswalkp. 252
- Appendix B — Terms the exam expects you to use preciselyp. 255
Tomado del PDF que descargas, con la página en la que empieza cada uno — no escrito a mano aquí.
Lee un capítulo completo gratis
Un capítulo completo, tal como viene en el eBook. Desplázate en la ventana para leerlo aquí; sin descargas ni correo.
Lee el capítulo 9 aquí, sin salir de la página
No te dimos la introducción fácil — el capítulo gratis abre en una de las partes más exigentes del libro, para que juzgues la enseñanza donde el examen se pone difícil.
Test plan Domain 3E, Phlebotomy: 12 of the 150 scored items. Tasks 3E1–3E15 and knowledge statements k122–k146: preparing the patient, verifying the order, choosing supplies and site, venipuncture and capillary puncture, order of draw, specimen handling and processing, labeling, transport, and responding to results.[1]
This chapter leans on the World Health Organization's Guidelines on Drawing Blood: Best Practices in Phlebotomy, the most detailed free primary source on technique, plus StatPearls for tube contents. Where a U.S. training program or your laboratory sets a stricter rule (for example, a shorter tourniquet limit), follow the stricter rule.
Blood components and bloodborne pathogens (k122–k123)
Whole blood contains cells (red cells, white cells, platelets) suspended in fluid. When blood clots in a tube with no anticoagulant, the fluid left after centrifuging is serum; the red-top tube has no additive, and blood is allowed to clot before it is spun.[2] When an anticoagulant prevents clotting, the fluid is plasma, as in the green (heparin) tube.[2] Treat every specimen as potentially infectious (Chapter 7).
3E1–3E2 Preparing the patient and verifying the order (k124–k128)
- Verify the order: the test, any timing (fasting, timed draws, drug levels), special handling, and the diagnosis code on the requisition.
- Identify the patient with two identifiers (Chapter 4) and match them to the requisition.
- Explain the procedure and obtain verbal consent; the patient has a right to refuse at any time before the sample is drawn.[3]
- Check preparation: fasting status, medications (anticoagulants increase bleeding), allergies (latex, adhesive, antiseptic), and any history of fainting.
- Special needs: a support person for an anxious patient or child, a witness when policy requires, and chain-of-custody documentation for forensic or workplace drug specimens (Chapter 8).
Seat the patient in a chair with arm support or have them lie down; never draw from a patient who is standing or perched on a stool.
3E3–3E5 Supplies, site selection and site preparation (k129–k131, k134)
Choosing the system
The evacuated tube system is standard for most adults; a winged (butterfly) set suits small or fragile veins, children and hand veins; a syringe allows gentle control of vacuum for collapsing veins. WHO's table matches needle gauge, length and device to the patient: the largest needles for blood donation, standard sizes for routine adult draws, and small winged (butterfly) sets for children, older adults and small veins.[3] Very small needles increase hemolysis risk and are used only when needed.
Choosing the site
WHO: the median cubital vein lies between muscles and is usually the easiest to puncture[3]; under the basilic vein run an artery and a nerve, so it carries more risk and pain.[3] Avoid places where veins divide (hematoma risk)[3], and never draw from an existing peripheral IV site, which can give false results[3]; draw from the other arm or below the IV per policy. Avoid scarred or burned areas, hematomas, edematous limbs, and the arm on the side of a mastectomy unless the provider approves.
Apply the tourniquet about 4–5 finger widths above the site.[3] Do not have the patient pump the fist: repeated clenching can temporarily raise potassium and give an incorrect result.[4]
Preparing the site
Clean with a 70% alcohol swab for 30 seconds and let it dry completely (about 30 seconds).[3] Alcohol is preferred over povidone-iodine for routine draws because iodine contamination can falsely raise potassium, phosphorus or uric acid.[3] Do not touch the cleaned site; if you must re-palpate, disinfect again.[3] Blood culture sites are cleaned with an antiseptic such as chlorhexidine to reduce skin contamination.[5]
3E6–3E7 Order of draw and venipuncture (k132–k133, k135–k136)
Order of draw
Tubes are drawn in a set order so additives do not carry over from one tube to the next on the needle.[2, 3] WHO's table, based on the U.S. consensus standard[3]:
| Order | Tube | Additive | Typical use |
|---|---|---|---|
| 1 | Blood culture bottles | Broth | Microbiology |
| 2 | (Non-additive discard tube if needed) | None | — |
| 3 | Light blue | Sodium citrate (3.2%)[2] | Coagulation (PT/INR); requires full draw |
| 4 | Red | None (clot activator in plastic tubes) | Serum chemistries, serology, blood bank |
| 5 | Gold / red-gray (SST) | Gel separator | Serum chemistries |
| 6–7 | Green (dark / light) | Heparin (sodium or lithium)[2] | Plasma chemistries, often stat |
| 8 | Lavender (purple) | EDTA | Hematology (CBC)[2]; requires full draw |
| 9 | Pale yellow | ACD | Special studies (HLA, DNA) |
| 10 | Gray | Sodium fluoride / potassium oxalate | Glucose (fluoride stops glycolysis)[2] |
Memory aid: cultures, blue, red, gold, green, lavender, gray. The logic: sterile first; citrate before anything with clot activator or anticoagulant that could disturb coagulation results; EDTA and oxalate/fluoride last because they alter so many chemistry values.
Capillary (skin puncture) order is reversed: hematology (EDTA) first, then chemistry, then blood bank, to limit platelet clumping.[3]
The venipuncture
- Anchor the vein with your thumb below the site.[3]
- Enter swiftly, bevel up, at an angle of 30 degrees or less.[3]
- Fill tubes in order; let each fill until the vacuum is spent (coagulation tubes must be full).
- Release the tourniquet as soon as blood flow is established where possible, and always before it has been on for two minutes; many training programs and laboratories set a stricter limit, and you follow whichever is stricter.[3] Release it before withdrawing the needle.[3]
- Withdraw the needle, activate the safety device, and apply gentle pressure with gauze; the patient keeps the arm extended and does not bend it, which causes a hematoma.[3]
- Invert additive tubes the number of times the laboratory specifies[3]; blood culture bottles are mixed 8 to 10 times.[2] Gentle inversion only: overmixing causes hemolysis, and undermixing causes clots.[2]
- Label before leaving the patient, with at least the patient's first and last names, identification number, date of birth, and date and time of collection.[3]
With a syringe, fill tubes without pushing the plunger, because extra pressure causes hemolysis.[3]
3E8 Capillary puncture (k130)
- Site: in adults the finger is usually preferred; the sides of the heel are used only for infants and neonates.[3] WHO recommends heel-prick from birth to about 6 months and finger-prick after that.[3]
- Finger: use the middle or ring finger, avoiding the thumb and index finger (calluses) and the little finger (thin tissue).[3] Puncture the side of the fingertip.
- Heel: use the medial or lateral plantar surface; avoid the posterior heel, where bone is close.[3]
- Technique: clean with alcohol and let dry; puncture in one quick stroke; wipe away the first drop (tissue fluid and debris)[3]; do not squeeze tightly, which dilutes the sample with tissue fluid and causes hemolysis.[3] Never reuse a lancet or a puncture site.[3]
- Children: after two unsuccessful attempts, get a second opinion before trying again or cancelling.[3]
3E9 Post-procedure care (k137)
Check that bleeding has stopped before applying a bandage; use paper tape or gauze wrap for patients with adhesive allergy or fragile skin; tell the patient to leave the bandage on for a short time and to avoid heavy lifting with that arm if a hematoma formed. If a patient becomes pale, sweaty or lightheaded, stop the draw, remove the tourniquet and needle, apply pressure, and lower the patient's head or have them lie down (Chapter 6); do not let them walk until recovered.
3E10–3E11 Handling and processing specimens (k138–k140, k143)
- Serum tubes stand upright and clot before centrifuging (StatPearls: 10–15 minutes for a red tube, and sometimes longer).[2]
- Centrifuge with balanced loads and closed tubes; never open a centrifuge until it stops.
- Aliquot serum or plasma into labeled transfer tubes with a transfer pipette, never by pouring.
- Protect from light specimens for light-sensitive analytes (for example, bilirubin) by wrapping in foil; keep cold or warm per the test requirements.
- Special collections: timed specimens and drug levels are drawn at the times the order specifies (peak and trough levels are timed to doses); fasting specimens after the ordered fast; blood cultures with strict antisepsis and, commonly, sets from separate sites as ordered.
3E12–3E15 Labeling, transport, results and distribution (k141–k146)
Match the label to the requisition and the patient before the specimen leaves the room (TJC: label in the presence of the patient).[6] Package for the reference laboratory with the requisition, at the required temperature, with the courier log completed. When results return, match them to the right patient and the ordering provider, flag abnormal and critical values (Chapter 8), and route them to the provider; the provider, not the medical assistant, interprets them for the patient.
Common specimen rejections and their causes: hemolysis (small needle, forcing blood through a syringe, vigorous mixing), clotted anticoagulant tube (poor mixing), short draw in a citrate tube (wrong ratio), wrong tube or order of draw, unlabeled or mislabeled specimen, and wrong temperature or delay.
Key numbers — Chapter 9
| Item | Value | Source |
|---|---|---|
| Tourniquet placement | 4–5 finger widths above site | [3] |
| Tourniquet time (WHO outer limit) | Release when flow is established; always before 2 minutes | [3] |
| Needle angle | 30 degrees or less, bevel up | [3] |
| Site antisepsis | 70% alcohol, 30 seconds, dry 30 seconds | [3] |
| Blood culture bottle mixing | 8–10 times | [2] |
| Citrate concentration | 3.2% sodium citrate | [2] |
| Serum clotting before spin | About 10–15 minutes (red top) | [2] |
| Heel stick age | Birth to about 6 months | [3] |
| Pediatric attempts | Second opinion after 2 | [3] |
Worked example — a four-tube draw
Order: blood cultures, PT/INR, comprehensive metabolic panel (gold SST), CBC (lavender). Identify the patient, verify consent and the order. Choose the right arm (the left has an IV). Tourniquet 4–5 finger widths above the antecubital fossa[3]; select the median cubital vein.[3] Clean the culture site with chlorhexidine per the culture protocol[5], then draw in order: culture bottles, light blue (filled completely), gold, lavender.[3] Release the tourniquet once flow is established and always before two minutes.[3] Invert per the lab's counts, mixing gently.[2] Label at the chair with names, ID number, date of birth, date and time.[3] Exam distractors built from this case: drawing the lavender tube before the light blue (EDTA carryover), drawing above the IV, shaking the lavender tube to "mix well," and labeling the tubes later at the lab bench.
Exam traps — Chapter 9
- Basilic first. The median cubital is usually easiest and safest; the basilic lies over an artery and nerve.
- Fist pumping. It can falsely raise potassium.
- Blue after lavender. Citrate before EDTA; cultures first.
- Capillary order same as venous. Reverse it: EDTA (hematology) first.
- Keeping the first drop. Wipe it away.
- Milking the finger. Dilutes the sample and hemolyzes it.
- Bending the arm after the draw. Causes a hematoma; keep it extended.
- Drawing above an IV. False results; use the other arm.
Key takeaways — Chapter 9
- Identify, verify, explain and consent before every draw.
- Site: median cubital first; avoid IV arms, hematomas and diverging veins.
- Order of draw prevents additive carryover; capillary order is reversed.
- Technique: anchor, bevel up at 30° or less, release the tourniquet promptly, gentle inversion, label at the bedside.
Chapter 9 quiz — 12 questions
1. An order calls for a CBC (lavender), a PT/INR (light blue) and a blood culture. In what order should they be collected by venipuncture?
- A. Blood culture, light blue, lavender
- B. Lavender, light blue, blood culture
- C. Light blue, blood culture, lavender
- D. Blood culture, lavender, light blue
2. Which vein does WHO describe as usually the easiest to puncture?
- A. The cephalic vein on the thumb side of the wrist
- B. A vein in the back of the hand
- C. The median cubital vein
- D. The basilic vein
3. A patient has an IV infusing in the left forearm. The right arm has usable veins. Where should blood be drawn?
- A. Through the IV catheter after pausing the fluid
- B. From the left arm, just below the IV site
- C. From the left arm, above the IV site
- D. From the right arm
4. While searching for a vein, the medical assistant asks the patient to pump their fist repeatedly. Which result is most likely to be affected?
- A. Blood culture growth
- B. Potassium
- C. Blood type
- D. Hematocrit, which will be falsely low
5. How long does WHO recommend the venipuncture site be cleaned with 70% alcohol and allowed to dry?
- A. No drying needed if the swab is sterile
- B. 5 seconds, then puncture while still wet
- C. 30 seconds cleaning, then 30 seconds drying
- D. 2 minutes of cleaning, then blow on the site to dry it
6. During a draw, the medical assistant realizes the tourniquet has been on while several tubes filled. What does WHO guidance say about tourniquet time?
- A. Release it once blood flows, before 2 minutes
- B. Reapply it tighter if flow slows during the draw
- C. Leave it on until the last tube has filled
- D. Release it only after the needle is withdrawn
7. A capillary glucose test is ordered for an adult. Which technique follows WHO guidance?
- A. Wipe away the first drop, then collect without squeezing hard
- B. Puncture the center pad of the index finger
- C. Use the first drop because it is the freshest
- D. Squeeze the finger firmly to increase the flow
8. A 3-month-old needs a capillary blood sample. Which site is appropriate?
- A. The earlobe
- B. The medial or lateral plantar surface of the heel
- C. The posterior curve of the heel
- D. The side of the index finger
9. A provider orders a CBC and a chemistry panel by skin puncture from a toddler. Which specimen is collected first?
- A. The chemistry specimen
- B. The blood bank specimen
- C. The hematology (EDTA) specimen
- D. Any order, since capillary samples have no order
10. Right after filling a lavender tube, how should it be mixed?
- A. Shake it vigorously for 10 seconds
- B. Invert gently as many times as the lab specifies
- C. Roll it between the palms for one minute
- D. Leave it undisturbed to settle
11. After the needle is withdrawn, the patient bends the elbow tightly over the gauze. What problem does WHO warn this causes?
- A. A falsely high potassium
- B. A contaminated culture
- C. A clotted specimen tube
- D. A hematoma
12. Which serum specimen handling step is correct for a plain red-top tube before centrifuging?
- A. Refrigerate it immediately without clotting
- B. Spin it immediately after collection
- C. Invert it continuously until it reaches the lab
- D. Let it clot upright before spinning
Chapter 9 answer key and explanations
1. A. WHO's order of draw places blood culture bottles first, the citrate (light blue) coagulation tube before other additive tubes, and EDTA (lavender) later[3], to prevent additive carryover between tubes[3]. Drawing lavender before light blue is the classic error, because EDTA carried into the citrate tube can distort coagulation results.
2. C. WHO states that the median cubital vein lies between muscles and is usually the easiest to puncture[3]. The basilic vein is tempting because it is often prominent, but an artery and a nerve run beneath it, making punctures riskier and more painful[3].
3. D. WHO advises against drawing from an existing peripheral venous access site because IV fluid, hemolysis and contamination can give false results[3]. The opposite arm avoids the problem entirely; drawing just above or below the IV on the same arm risks diluting the sample with infusing fluid.
4. B. MedlinePlus notes that repeated clenching and relaxing of the fist just before or during a blood test may temporarily increase potassium, leading to an incorrect result[4]. The other results are not what fist pumping is known to distort, which is why potassium is the one to protect.
5. C. WHO directs cleaning the site with a 70% alcohol swab for 30 seconds and allowing it to dry completely, about 30 seconds[3]. Puncturing a wet site is the common shortcut; it stings and gives the antiseptic too little contact time, and blowing on the site recontaminates it.
6. A. WHO notes that the tourniquet can be removed as soon as blood flow is established and should always come off before it has been in place for two minutes[3], and it is released before the needle is withdrawn[3]. Withdrawing the needle with the tourniquet still on is the tempting error, since it pushes blood out of the puncture and promotes a hematoma.
7. A. WHO says to wipe away the first drop because it may contain tissue fluid or debris[3] and to avoid squeezing tightly, which dilutes the sample and causes hemolysis[3]. The index finger is avoided because of calluses[3].
8. B. WHO recommends heel-prick from birth to about 6 months[3], using the sides of the heel[3], and avoiding the posterior heel, where bone is close to the skin[3]. Finger-pricks are for children older than about 6 months.
9. C. WHO specifies that with skin punctures the hematology specimen is collected first, followed by chemistry and blood bank, to minimize platelet clumping[3]. This is the reverse of venipuncture, which is why venous habits lead people to draw the chemistry tube first.
10. B. WHO directs inverting additive tubes the required number of times specified by the laboratory[3]; StatPearls cautions that overmixing causes hemolysis and undermixing forms small clots[2]. Vigorous shaking is the classic error because it seems to guarantee mixing.
Sources cited in this excerpt
- NHA Certified Clinical Medical Assistant (CCMA) Test Plan (based on 2022 job analysis). National Healthcareer Association, 2022-05-05. https://www.nhanow.com/docs/default-source/test-plans/nha_ccma_test_plan_2022.pdf
- Laboratory Tube Collection (StatPearls). StatPearls (NCBI Bookshelf, National Library of Medicine), 2025-02-04. https://www.ncbi.nlm.nih.gov/books/NBK555991/
- WHO Guidelines on Drawing Blood: Best Practices in Phlebotomy. World Health Organization, 2010. https://iris.who.int/bitstream/handle/10665/44294/9789241599221_eng.pdf
- Potassium Blood Test. MedlinePlus, U.S. National Library of Medicine, 2026-09-24. https://medlineplus.gov/lab-tests/potassium-blood-test/
- Blood culture. MedlinePlus, U.S. National Library of Medicine, 2026-09-24. https://medlineplus.gov/ency/article/003744.htm
- National Patient Safety Goals Effective January 2026. The Joint Commission, 2026-01-01. https://digitalassets.jointcommission.org/api/public/content/92c95c4e94304b2084e7e039d916719b?v=3c64fe83
Preguntas frecuentes
¿Cómo lo recibo?
Paga y la descarga aparece en esta página al instante. Los enlaces también se te envían por correo. No hace falta cuenta.
¿Y si no es para mí?
Escríbenos dentro de 14 días para un reembolso total, sin preguntas.
¿Va a desaparecer la práctica gratis?
No. Todas las preguntas, el simulacro cronometrado y los capítulos gratis del sitio siguen gratis. Este libro es la mitad de estudio, no una valla alrededor de lo gratuito.
Más preguntas (1)
¿Puedo leerlo en el móvil?
Sí — el EPUB es para móviles y e-readers, el PDF para imprimir y marcar. Recibes ambos.
¿Por qué comprar el libro si la práctica es gratis?
Nuestras preguntas de práctica y el simulacro cronometrado siguen gratis: nada del sitio se esconde tras este libro. El libro de $19.99 es la mitad de estudio: el material en sí, explicado en orden, en un archivo tuyo.
- Enseñanza sistemática — cada sección del examen explicada capítulo a capítulo, de principio a fin, no solo preguntas
- Imprímelo y márcalo — un PDF listo para papel que puedes resaltar, anotar y llevar a tu mesa de estudio
- Estudia en cualquier lugar, sin conexión — EPUB en tu teléfono o e-reader; sin wifi, sin pestañas
- Todo en un solo lugar — los capítulos y las preguntas de práctica en un archivo
- Tuyo de por vida — pago único de $19.99, descarga instantánea, sin suscripción
Los detalles
- Verificado con la fuente oficial(NHA CCMA Test Plan (2022 job analysis) and NHA Candidate Handbook (updated June 1, 2026), read September 2026)
- 300 preguntas de práctica gratis
Un medical assistant training program cuesta $900–$3,799. Este libro enseña el mismo examen — las mismas reglas, verificadas a los estándares actuales — por un pago único de $19.99 que conservas de por vida.
Compra única, acceso de por vida a la descarga. El eBook es la guía completa de CCMA — Certified Clinical Medical Assistant (NHA) en PDF y EPUB. Resumen educativo, no asesoría profesional ni legal — confirma siempre las reglas vigentes con la fuente oficial. Última actualización: October 2026.